Boat audio can become the noisiest and most power-hungry system on the helm if the stereo, amplifier, speakers and network are not planned together, and the failure mode is familiar: a stereo that cuts out when the engine starts, engine hum in the speakers, or an MFD that cannot control the music. A Fusion stereo can be integrated with NMEA 2000 and a compatible plotter for source selection and volume control, but only if the network, power and speaker wiring are done properly. This guide explains the audio network options, how to connect a Fusion stereo to NMEA 2000, how to size amplifier fuses and wire, and how to avoid noise.
Marine audio network options
| Network | What it connects | Use it for |
|---|---|---|
| NMEA 2000 | Stereo to compatible plotters and MFDs | Source selection, volume, track information |
| Ethernet (PartyBus) | Multiple Fusion stereos and some accessories | Multi-zone audio sharing |
| Bluetooth / Wi-Fi | Phones and tablets | Remote control via the Fusion-Link app |
Keep audio Ethernet on its own network or switch rather than mixing it with sonar and radar traffic, unless the manufacturer states that mixed use is supported. A busy network can cause audio dropouts or slow sonar updates.
Connect a Fusion stereo to NMEA 2000
Step by step
- Confirm that the stereo and the MFD support NMEA 2000 audio control and note the firmware requirements.
- Place a T-connector on the backbone near the stereo.
- Connect the stereo’s NMEA 2000 drop (6 m maximum) to the T-connector.
- Check that the backbone has two terminators and adequate power.
- Enable the audio control on the plotter, and select the stereo as a source.
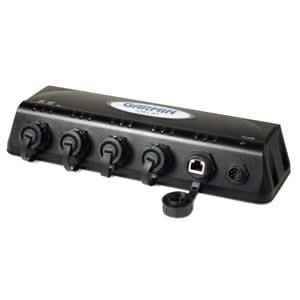
Installer Tip: If the MFD cannot find the stereo, test the NMEA 2000 network first: measure about 60 ohms between CAN-H and CAN-L with power off, check voltage at the stereo, and update firmware on both devices. Our NMEA 2000 guide covers the full procedure.
Power and amplifier wiring
Size the fuse and wire for the amplifier
Amplifier current depends on output power and efficiency. A class D amplifier delivering 400 W RMS at about 85% efficiency draws roughly 35 A from a 13.5 V supply at full output, plus idle current, so a 40 to 50 A fuse and a heavy cable are typical. Use the manufacturer’s recommendation first, then check voltage drop: Vdrop = 2 × length (m) × current (A) × 0.0172 ÷ area (mm²).
| Run (one way) | Wire size | Voltage drop at 35 A | Percent of 13.5 V |
|---|---|---|---|
| 3 m (10 ft) | 10 mm² (8 AWG) | 0.36 V | 2.7% |
| 3 m (10 ft) | 16 mm² (6 AWG) | 0.23 V | 1.7% |
| 5 m (16 ft) | 16 mm² (6 AWG) | 0.38 V | 2.8% |
Mount the amplifier in a dry, ventilated location, and fuse the positive within 7 inches (18 cm) of the battery or bus. Run power cable separately from signal cables to reduce noise.
Speakers: choose, wire and seal
- Size and power: match speaker RMS power to the amplifier channel and use marine-rated speakers with UV and corrosion resistance.
- Impedance: use the impedance the amplifier is rated for, usually 4 ohms.
- Cable: use tinned marine speaker cable (typically 14 to 16 AWG) and keep runs as short as practical.
- Connections: use heat-shrink butt connectors or sealed terminals, and keep polarity consistent to maintain phase.
- Mounting: seal the cutout to keep water out of the cabinet and use drain paths for wake and rain.
Eliminating noise and interference
Alternator whine, ignition noise and ground loops are the usual culprits. Run power cables away from signal cables, use shielded RCA cables, connect the amplifier ground to a clean negative bus, and avoid sharing a ground path with the engine’s high-current wiring. If noise appears only with the engine running, check the stereo’s and amplifier’s grounds first, then the alternator output and battery connections.
| Symptom | Likely cause | Fix |
|---|---|---|
| Whine that rises with engine rpm | Alternator noise or ground loop | Check grounds; separate power and signal cables |
| Stereo resets with engine start | Voltage sag at the stereo | Measure voltage under load; upsize wire |
| No control from MFD | NMEA 2000 fault or firmware mismatch | Test the network; update firmware |
| Distorted sound at high volume | Clipping or wrong impedance | Check amplifier settings and speaker impedance |
Planning a multi-zone system
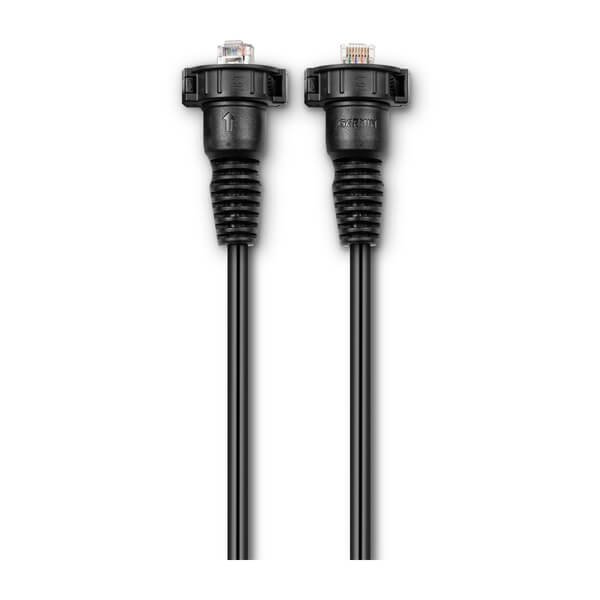
For larger boats, plan zones (helm, cockpit, cabin) and decide how audio is distributed. Use a separate network or switch for audio Ethernet, keep cable runs tidy and label every connection. A good plan reduces noise and makes future upgrades far easier.
Shop parts and get advice
See our marine power and rigging accessories and electronics and power for cables, gateways and fuses. For network layout advice, read our marine Ethernet guide, and contact us with your boat layout for audio integration help.
Sound quality: placement and gain setting
Even a well-wired system sounds poor if the speakers and amplifier are set up badly. Speakers should face the listening area with a clear path, and cockpit speakers work best mounted on the underside of a hardtop or on a tower rather than on the gunwale, where wind noise and reflections reduce clarity.
- Set the amplifier gain with the head unit at about 75% of maximum volume, not at full gain.
- Turn the gain up until you hear distortion, then back it off slightly.
- Use the head unit’s zone or speaker EQ to reduce low-frequency boom on open boats, where bass escapes quickly.
- Apply a high-pass filter on small speakers so they do not try to reproduce frequencies they cannot handle.
- Listen at the helm, at the cockpit and at the bow, and adjust zone volumes separately.
Firmware, apps and control
Many network audio problems follow a firmware mismatch between the stereo, the plotter and any wireless remote. Update the stereo first, then the plotter, then the phone app. After each update, restart the NMEA 2000 network by cycling power, and confirm that source selection and volume control still work from both the plotter and the app. Keep a note of firmware versions in your boat log so you can find what changed if a fault returns.
| Control method | Range | Notes |
|---|---|---|
| Plotter over NMEA 2000 | Wired, whole network | Most reliable; works without Wi-Fi |
| Wired remote | Local | Good for the helm and a tower |
| Phone app over Bluetooth or Wi-Fi | Short to moderate | Convenient but depends on signal and interference |
| Voice or watch control | Short | Check compatibility with your stereo model |
Power quality and protection
Audio is sensitive to supply voltage. A stereo head unit usually accepts about 10.5 to 16 V, but an amplifier can clip or cut out if voltage sags during engine starts. Fit a dedicated fused feed to the amplifier from the battery or main bus, consider a lithium bank with low internal resistance for high-power systems, and keep the audio ground on the same negative bus as the rest of the electronics. Our voltage drop guide shows how to check the cable.
Planning checklist before you buy
- Count zones and speakers and decide whether you need one amplifier or several.
- Confirm the stereo works with your plotter model and firmware.
- Draw the NMEA 2000 backbone and note where the stereo drops in.
- Calculate the amplifier current and size the fuse and cable.
- Leave room in the helm layout for the remote and for future upgrades.
Example system layouts
| Boat | Stereo and zones | Amplifier | Notes |
|---|---|---|---|
| 20 ft center console | Head unit plus two cockpit speakers | Small amplifier or built-in | Keep it simple; protect against spray |
| 26 to 30 ft center console | Head unit, four speakers and a subwoofer | 400 W class D amplifier | Add NMEA 2000 control and a dedicated feed |
| 35 ft sportfisher or cruiser | Multi-zone: helm, cockpit, cabin | Multiple amplifiers | Use audio Ethernet on its own switch |
Plan the layout on paper, mark speaker positions and cable routes, and check that every cable can be reached for service. A neat, labelled install is easier to fix at sea.
Care and maintenance for a long-lasting audio system
Marine audio fails slowly: speaker cones lose their surround to UV, connectors green up, and an amplifier that runs hot in an unvented space ages early. A short routine keeps the system sounding right season after season.
| Task | How often | What to do |
|---|---|---|
| Rinse speakers and head unit with fresh water | After salt-water trips | Use a soft cloth and avoid pressure washing the grilles |
| Check speaker and amplifier terminals | Every season | Clean, tighten and protect with corrosion inhibitor |
| Check amplifier ventilation | Every season | Clear dust and make sure nothing is stowed against the heat sink |
| Update stereo and app firmware | Twice a year | Follow the manufacturer order: stereo, then plotter, then app |
| Test every zone | Start of season | Play a test track and listen for crackle, hum or a dead channel |
Cover the head unit and cockpit speakers when the boat is stored, and keep the stereo’s removable faceplate or remote out of the sun. Fresh water and a few minutes after each trip prevent most of the failures we see.
Frequently asked questions
Can I control a Fusion stereo from my chartplotter?
Yes, many Fusion stereos can be controlled from compatible plotters over NMEA 2000, subject to firmware and model support. Check both devices before buying.
What fuse do I need for a marine amplifier?
Follow the amplifier manual; a 400 W RMS class D amplifier typically needs a 40 to 50 A fuse near the battery with heavy-gauge cable to keep voltage drop under 3%.
How do I stop alternator whine in boat speakers?
Separate power and signal cables, use shielded RCA cables, connect grounds to a clean negative bus and check battery and alternator connections.
Should audio Ethernet share a network with sonar and radar?
It is better to keep audio on its own network or switch unless the manufacturer states mixed use is supported, because heavy traffic can cause dropouts.